Tuesday, November 30, 2010

Christmas Cards

The first commercially produced Christmas Card (London, 1843)
Image Credit: Wikipedia


For the very first time, I decided it might be a good idea to start thinking about Christmas cards a bit earlier than usual. Typically, it only dawns on me sometime around December 23rd that I should get going on that project!

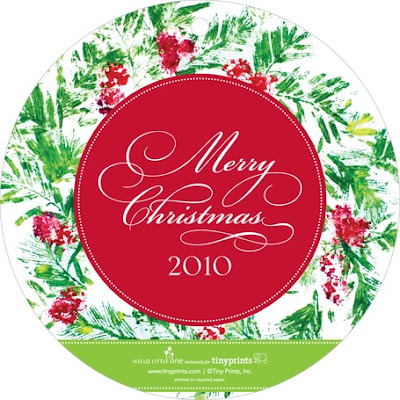
Thanks to a tip on Rambling Renovators, I decided to try making my own cards this year the "New Fashioned Way," that is, online. J. at Rambling Renovators has used Tiny Prints in the past to make cute cards and I thought I would give the site a try.

I've looked at a few different sites this week that offer a similar service and I have to say that I like the designs and ease of use on Tiny Prints the best so far. My only difficulty was in uploading photos directly from iPhoto. I had to upload them onto Picassaweb, where I have an account, and then pull them from there. If you don't use iPhoto or have most of your photos online on Facebook or Picassa (etc.) already, you shouldn't have any trouble.


Here are some mockups so far, though I am keeping the one we'll actually send a secret for now:


One of the best parts is that you get something that is personalized without having to take on a major DIY project and they will even address and mail them to your friends if you have your list ready. There is a promotion on right now for these in case it is something you might think about doing! 

DIY Rating: 8
Took some time to pick out a design and the photos, 
but overall, one of the better websites for this type of thing 
and the cards were fun to make. 

My only criticism is that iPhoto was not well supported.


PS. This is not a paid promotion!

PPS. All photos are the property of Filia Artis at The Do-tique, please do not use or reproduce without permission.

Monday, November 29, 2010

Getting Ready with Eddie!

K-Mart
Decorator Station, North Pole
International

From: Filia Artis
The Do-tique
Kingston, Ontario
Canada


Dear Eddie, 

Your video on using materials from K-Mart to decorate for Christmas this year reminded me of my childhood. My parents saved the packaging from their K-Mart decorations from the 1970s and used them to store those decorations for years!

I had a nightmare recently that I decorated my whole house and you were coming over to visit, but then when you got here, all the decorations had disappeared!! I hope this never happens!

Thank you for your awesome ideas on how to use artificial wreaths and garlands and make them look great! The Christmas Elves here at The Do-tique will be briefed later this afternoon and I expect they will get to work very soon!

Please tell Santa that I have been a good little homemaker.

Your Reader, 

Filia Artis at The Do-tique


Holiday Planter

British Christmas Card (1880) 

I love the mistletoe wreath in the illustration. Mistletoe doesn't actually grow in Canada, and since it is a parasitic plant, it may even be banned here, which is why it is rarely seen at Christmastime. When I lived in Germany, it was a novelty for me to see it being sold at the Christmas Markets in town.

Since it is officially Advent, it's time to get started on some decorating around the house. I did put up my first outdoor decoration yesterday. I can't resist putting up fresh evergreen garlands and wreaths! My plan was to put together a holiday planter for my front walkway. I keep seeing them at the grocery store for about $20 and I was sure that I could make one myself. 

Here is how mine turned out:


Here is the how-to:

1. Take a summer planter or urn and empty out the flowers and leave the potting soil in the pot.

2. Cut 5-6 stems of dogwood (bush with red branches) or another woody bush (you can spray paint the branches to red, white or gold or leave them natural). Cut about 8 small branches from two different types of evergreen tree (I used spruce and cedar). Find something with berries and cut about 8 small branches.

3. Stand the branches in the middle of the planter in the potting soil. Add the evergreen foliage in a circle around the edges of the planter. Fill in with berry branches.

4. Take two apples (or some lemons or some pine cones) and spear them with a straw or small stick or piece of wire and then push them into the soil as well. Add a ribbon somewhere if you like. 

Total time: 20 Minutes and all the materials came from overgrown bushes in my own yard.

The added bonus, I'll have something to cheer me when the ground is covered in snow and all my flowers are having their winter sleeps.

DIY Rating: 9
Pretty easy and possible to do 
with a small child trying to help!

PS. Ok, the apples that I put into the planter were eaten by morning and not a trace remains...you might want to stick with pine cones! I'm going to try to replace them with some ribbon.

Sunday, November 28, 2010

The Advent Season

 Painting by Jan Provoost         Image Credit: Secret Harbour


One of the very last holiday seasons to remain outside the purview of commercialization is the Advent Season. It tends to get buried in what I like to call the "Commercial Christmas Preparation Marketing Season," which typically starts on November 1st. The advent season, in fact, is the time of year that some Christians celebrate as a time of waiting and preparation for Christmas. Whereas the actual Christmas Season runs from Christmas Eve to the Epiphany, early in January. You are probably familiar with the famous chocolate advent calendars. 

The very word, "Advent," translates to "a coming" or "an arrival". We celebrate the Advent of the Emmanuel, which translates to, "the coming of God among us."

This year, Advent begins today, Sunday, November 28th. To me, the painting above symbolizes the meaning of Advent. In the image, the Virgin and Child are shown with St. Jerome, St. John the Baptist, and a Carthusian Monk. To me, Christmas is a celebration of the birth of Christ. St. John the Baptist's life was spent proclaiming the Nativity of Christ to come and St. Jerome and the Carthusian monk represent the praying, meditation and fasting that go along with preparing for the coming of Christmas during the Advent Season.

With all that is happening in the hustle and bustle of The Do-tique, we will be striving to take some time each day to slow down and enjoy our family and to reflect on what Christmas means for us. I hope you will consider joining us.

Photo Credit: Here


DIY Rating: 10
Taking some quiet time in the middle of the mayhem 
of the Holiday Season is always a good idea!


PS. Yes, there is an associated craft to go with the season...Check out Mom's Party Cafe for instructions!

Friday, November 26, 2010

Reader Question: Coat Hooks

"This reminds me of a project I have been stuck on: installing new coat hooks at the back entrance. It is possible to buy a board with coat hooks to attach to the wall, but to buy enough would cost about $300! Instead, I would like to buy a couple of pieces of wood (about 48" x 5" x 1"), screw in some hooks, and then attach the wood to the wall. But I have no saw, sander, etc. I had assumed that the lumber yard would not have appropriate wood for me. Do you think I am wrong? (Do you think they would paint the wood for me too?)" Posted by Cburrell


Dear Gentlereader,

Oh my, $300 and all that work to hang some coats? That's almost enough to employ an elf to do it for you! I am not sure whether I understand your project completely, but I think I get the idea of what you are trying to do and I am pleased to let you know that there are products on the market that have taken most of the work out of this for you.

Did you know that you can buy "boards" with the hooks mounted on them and then just mount the boards onto the wall? If you need a wider width, just purchase a few of them and hang them in succession.

Here are two carried by IKEA, both for well under $20/each. Similar items can be found at places like the Home Depot.
Leksvik Coat Hooks $16.99 at IKEA


Tjusig hooks $12.99 at IKEA

What you will need for this project are the following basic tools:

  1. Drill with bits and a screwdriver
  2. Stud finder
  3. Small level
  4. Screws and drywall plugs
  5. Hammer and measuring tape
Since typically these racks don't come with hardware, you might want to take the whole thing to the store and have someone there help you pick out the right screws and advise you as to whether you need drywall plugs. Another tip is to ask that person which drill bit to use for that hardware and write it down. It will save trying out different bits and possibly drilling a hole that's too big (been there, done that!). 

It will also help to have the stud finder so that you can try to align some of your screws into the wall studs for extra sturdiness.

For those readers with more time on their hands than others, it's worth checking out thrift stores, online auctions, kijiji and the Habitat for Humanity Re-stores for second hand tools. For the rest of us mere mortals who have to pay full price at an ordinary store to save on time, the good news is that they are pretty useful for a variety of basic home projects.

To CBurrell, good luck in your mission!


DIY Rating: 7
It's pretty easy to install this type of coat hook system, 
but it involves some measuring and a level to get it to look good 
and a drill is a key power tool for this one!

Lumbering Along

Photo Credit: Life

Today's topic is about buying lumber. To be honest, I find the process a bit intimidating and usually leave this job to others. There is also a paucity of power tools around The Do-tique, so we don't often engage in projects requiring more than a couple of 2x4s or some trim. And is anyone else out there totally confused about why a 2x4 is still called a 2x4 when those aren't the modern dimensions for this piece of wood? 

Last weekend, we packed Baby up and headed out to the Home Depot to see if we could find some wood to build two shelves into the closet in our home office. (The shelves will hopefully create a place for a printer and additional file storage.) Yes, this meant tackling the lumber aisle! Hubby started out in the closet organization section and picked up two pre-fab shelves with a melamine coating that didn't quite fit our dimensions and cost $17.99 each (we would have needed 4). The advantage here was that everything was pre-finished, so just cut to size and install...


However, I insisted that we go forth into the lumber section to see if there were any options that might be a better fit with our dimensions.

Often, when I think of lumber, I assume that all I will be able to find is an enormous piece of wood that won't fit into our car, that will have to be cut to size, sanded, primed, painted and then installed. It seems like just too much work.

The truth is that someone must have figured this out and created lumber that comes pre-finished for projects. You do not need to buy raw lumber and do all the work! There were a number of sizes and colors available and even the gigantic pieces cost less than a single shelf from the closet organization section.

In the end, we came home with two pre-cut, pre-finished shelves from an off-cut bin in the lumber section for significantly less than the closet organizer shelves would have cost.

A few things to keep in mind:


  1. Always come with your exact measurements handy - we spent 15 minutes in disagreement over whether the closet was 31 or 32 inches wide (settled for 31 1/2!)
  2. Since most of the "storage kits" have to be assembled by you anyway, consider whether you are handy enough to put your own simple shelving together out of the pre-finished wood in the lumber aisle
  3. Home Depot offers a cutting service, so if you know your measurements, the store can pre-cut the wood for your project. The first three cuts are free and in our case, we only needed two cuts
  4. Check the off-cut section for smaller projects - since we were only installing two shelves, we were able to find an off-cut of the wood we were looking for at a deep discount (material cost ended up being under $10 with hardware)

Now, all that is left is carefully nagging Hubby to help me install them over the weekend...

DIY Rating: 6 
Anything involving building from the lumber aisle is for the handy at heart, 
BUT if you do need something very simple, check the off-cut section, 
you might be able to find just what you need in a pre-finished, pre-cut material.

PS. I did honestly try to make a nifty Google SketchUp drawing of my closet plan for the blog, but now I don't know how to get that image onto Blogger!


Thursday, November 25, 2010

Public Service Announcment

Photo Credit: Newark News Radio Club

This is a public service announcement to all readers to inform you that Knitting Addiction Disorder, otherwise known as KAD has been detected at The Do-tique. This not uncommon affliction is not deadly, but can cause midnight finger twitching should the affected person run out of yarn and be left without a knitting project for 48 hours or longer. It has caused the author of this very blog to visit Wool Tyme, a store well-known to Kingston authorities, to purchase further wool and receive needle training. Her symptoms include compulsive knitting and an escalating obsession that began with garter stitch and has now progressed to a rib stitch. Individuals affected with KAD can be heard muttering, "knit the knit and purl the purl," in living rooms across the nation. I repeat, KAD is not deadly, but citizens are cautioned to avoid yarn aisles at craft stores and elderly ladies on the internet offering knitting advice via video.


Infected individuals can often experience an over-growth of warming fluff cells such as scarves, socks and gloves eventually progressing to sweaters, a signal of chronic illness.


Offers materials, lessons, workshops and a knitting community.
The store clerk was kind enough to show 
me how to get started on a rib-stitch.


Monday, November 22, 2010

The Plague


About two weeks ago, Baby started attending her day care. It was a big moment for us to see her go off to "school" and we've already noticed some big developments in a short time. For instance, she can feed herself dinner now and doesn't need our help anymore.

However, as all you parents out there can relate, out of the ten days that she's been attending, she has already been home sick for five of those days. She has been sick over the weekends, which is our special time with her and it looks like we are going to have to keep her home tomorrow and maybe the day afterward too.

All this is making for a slow work-week for me and Hubby and most of the doing around The Do-tique has been cleaning up sickness related messes and giving baths and cuddles. I'm beginning to wonder whether childcare works better as a DIY project...


Thursday, November 18, 2010

A Stitch in Time

Photo Credit: Life


It occurred to me last week that it might be time to join the esteemed ranks of those women who are always knitting. I usually pick up a craft each winter to keep me busy in the evenings and I felt the knit-itch following my first visit to a local "Craft n' Chat" group. I had brought some computer work to do, but everyone else was knitting away. Of all the crafts and needlework that I can do, knitting is the one task that has always eluded me. I don't know why, but I have never been able to master it in the past.

So, with some doubts about my abilities, I headed to the yarn section of Michael's and after spending about 25 minutes scanning through all the different types of yarn they have there, I broke down and asked a couple of ladies who were shopping in the same section for their advice. They helped me to pick out a fat, easy to work with yarn and the right needles for making a scarf. A basic, idiot-proof scarf...I hoped!

Thus armed, I turned to the internet and found these great videos online that show exactly how to get started:


The result? So far, pretty good. The instructions online and the help I got in the store did work out for me and I'm a fair way into an easy scarf. I only wish I hadn't made it quite as wide as I did.


Photo Credit: Filia Artis

This was made with a pair of #9 metal needles and two balls of Lion Brand, Wool-Ease Thick and Quick yarn. What I've learned so far from the gurus is that it's all about tension, even tension and not knitting too tightly, and that you need to learn to knit, unknit and knit again. There is apparently no project that doesn't need to be unknit at some point.

If you enjoy crafting and your fine motor skills are decent, this could be for you. I was surprised that I finally got this to work out for me but probably wouldn't recommend it to someone who hates fine work.

DIY Rating: 6

An easy scarf was actually pretty easy, 
but this is an activity for people who like crafting.

Sunday, November 14, 2010

Pot-Luck Lucky!

Photo Credit: Filia Artis

As I mentioned earlier today, we hosted a gathering this afternoon to celebrate the birthdays of all the babies that were in our Baby's pre-natal preparation class more than a year ago. None of us fully knew then what the outcome would be, but everyone ended up with wonderful, healthy children and they have had a chance to play and grow together on a few occasions over the past year.


Festive Buffet Table - Mix n' Match

You might ask how on earth one goes about preparing for a party with a little one running around and without going totally crazy...The key here is pot-luck. Each family brought one item, so it was just a matter of tidying up the house - we did the set up and decorating a day ahead of time - and to clean up, we just popped everything into the dishwasher and give most of the toys a bit of a wipe down (there was a fair amount of communal toy chewing!). The total clean up time was 15 minutes and the food arrangements took place over email. 


Photo Credit: Filia Artis

A nice mix of home-made and store-bought treats made for a lovely lunch buffet. The only cooking that I did was to make a super-easy pizza that took about 15 minutes to make.


Photo Credit: Filia Artis

One mom, S., brought these awesome cupcakes she'd ordered with each of the children's names on them!


Photo Credit: Filia Artis

Much fun was had by the birthday children.

All in all, it was a wonderful day and we couldn't get over how easy the pot-luck aspect made things. I would definitely consider doing this again.


DIY Rating: 8
Though I'm typically a fan of catering and restaurants for larger parties, organizing a pot-luck party made hosting at home a breeze.

If you are a guest, don't feel daunted by having to make a masterpiece, something simple or store-bought can be a great addition.

Quiet Before the Storm

Photo Credit: Life

Thankfully, Hubby volunteered to take Baby out of the house early this morning to pick up some groceries for the week leaving me at home with a few minutes of quiet.

I'm always ambitious about these precious moments, "Oooohhh goody! I'll get the whole house cleaned and bake some bread and make up the pizza for the birthday party this afternoon!"

Five minutes later and I find myself relaxing on the sofa with a cup of coffee catching up on my blog reading...

I think I find blog reading so relaxing because it lets me into the lives of other women (and one man) out there for a brief moment and I feel that I am not alone in my quest to juggle all the aspects that life as a parent/homemaker/career woman/artist brings. 

One of my newer blog interests is at A Laborer in the Vineyard authored by one of my former classmates at St. Joseph's College at the University of Toronto. I am impressed with A.'s beautiful crafts, beautiful daughters and reflections on life and childbearing.

The reason I've titled this "Quiet Before the Storm" is that a group of eight wonderful one-year-olds and their parents is about to descend on my house later this afternoon for a birthday party. It will be an afternoon of crazy toddler fun with the group of parents that we met at our childbirth preparation class last fall. We've stayed in touch now for over a year and since most of the kids have their birthdays in November/December, we decided to just have a big party to celebrate everyone's birthdays.

Maybe wasting a bit of time enjoying the  quiet of this morning isn't such a bad idea after all...


DIY Rating: 10 
for taking a few minutes out of the day 
to just do nothing important at all...

Friday, November 12, 2010

Confessions from the Upper East Side


Dear Reader,

I confess that I am a follower of the tv show Gossip Girl. For all its fluffy plots and repetitive drama, I somehow love seeing the scenes of New York and the glamorous characters and their outfits.

If you are not already a fan, you may not have met the two characters pictured above: the handsome Nate Archibald and his mysterious new girlfriend Juliet. In this week's episode, Nate ran a bit of a sting operation with his sometimes friend, sometimes enemy, Vanessa to find out what exactly Juliet has been hiding behind all of her thin lies.

It turns out that she does not live on the Upper East Side, like the rest of the characters, but rather inhabits a small studio somewhere around 126th St. Her big confession is that she takes the metro north bus to shop at Woodbury Commons twice a month, does her own hair and has an apartment with fluorescent lights full of IKEA furniture that she had to put together herself! She keeps the tags on clothes that she wears so that she can return them. In the photo above, she is arriving as a penitent to the NY Ballet opening night wearing a dress from Woodbury Commons instead of a couture piece like her "frenemies" Serena and Blair.

The purpose of this letter is to let you know my shock in learning that these tendencies (minus the tags on the clothes!) were deemed such reprehensible sins! I would like to inform you that I myself do not live just off Park Ave., only recently shopped at Woodbury Commons (a designer outlet mall about an hour north of Manhattan) and also have a house full of IKEA furniture. I also have to do my own hair regularly. It was very hilarious to see Nate extend his "acceptance of others" and forgive Juliet for these "low-class" tendencies.


For the Big Confession,
check out: Much Music
Clip 2, 5:45

xoxo

Filia Artis

PS. Does this mean no more Dollarama for me?

Saturday, November 6, 2010

Greeting Cards


Remember back in grade school how you used to make cards for your mom and she loved them, no matter how they turned out???

It has been raining non-stop here for a couple of days, so I have been trying to find ways of entertaining myself and Baby in the house. We had a birthday party to go to today for one of Baby's friends and yesterday I thought it might be a fun time to try out my new craft area in the basement and make a personalized card. 


Baby had fun signing the card herself and washing off the crayola marker from her hands was pretty easy.

Some of the best cards I have ever received have been home-made ones. My friend Ise made one that I decided to frame above the diaper changing table.


If only I could find the birthday card a friend, KvD, once made me that was based on this image from a medieval book. The image depicts the owner, the Duke Jean de Berry, seated at his table with many of his actual possessions and courtiers present.


My version showed me at the table with drawings of all my friends standing around the table. Sadly, it is filed away for safe keeping somewhere and I'll probably un-earth it in about ten years!

If you are less than crafty yourself, there is a program you can use called Smilebox that I have been using for the past year. You can create all sorts of cards and invitations and either print them or email them out. It allows you to add photos from your own computer as well. Here is an invite I sent out for Baby's baptism this past spring:


Click to play this Smilebox invite
Create your own invite - Powered by Smilebox
Create your own invite


So next time you have a chance, try making a card either by hand or on the computer. It doesn't have to be Martha Stewart perfect to be cool!


DIY Rating: 7 for making your own card

Lots of fun and very personal if you have the time!


PS. A special Do-tique shout-out to K.G. who threw an awesome birthday party today for her little boy!

Thursday, November 4, 2010

Good Housekeeping

Photo Credit: Getty Images

I will begin by admitting that I grew up in one of those homes that had rooms that remind some people of a museum. They were immaculately clean, everything was perfectly displayed, the furniture all matched and was never used and woe be to the child whose footprints were detected on the area rug. Some of my classmates' mothers even kept plastic on the couches to ensure that they were suitably preserved for all eternity.

Needless to say, I can be a bit of a clean freak in my own home. There are no display rooms, but I do get a certain sense of peace when things are clean and tidy. The problem is that many of us don't have the time anymore between jobs, family, activities and traveling to keep up with housework, which we all assume is a DIY project.

So today, I want to put a question out there to my readers. It goes something like this:

If you are busy with anything you love more than sweeping, mopping and doing toilets and you can find room in your budget to hire help...
WHY are you wasting precious time cleaning your own house???

When I was 4 months pregnant and too ill to do much of anything, I had to make the painful admission that I was unable to help with the cleaning and Hubby was too busy working and writing a book to keep things up to my standards. Hubby stepped in and hired a lady to come twice a month to take care of dusting, sweeping, mopping, the kitchen and the bathroom. It was a godsend. Even before my pregnancy, we would spend every precious Saturday cleaning the apartment when we could have been enjoying some leisure time together instead.

The options here are to hire a cleaning company or an independent individual.

The advantage of bringing in a company is that they should have insurance and do background checks on their employees. From my experience, they tend to be more expensive and one company I sought a quote from requires that you have them in for one or more comprehensive deep cleaning sessions (for a fairly high charge) and then they come regularly after that and maintain your home.

We decided to go with an independent woman who had been cleaning the home of one of our friends for a while. We had the reference from that friend and references she provided from a few of her other clients and we have been happy with her work. We discussed what I wanted taken care of each time and she provided a flat rate based on that combination of tasks with the size of our home in mind. She enjoys it as a retirement job where she gets to be her own boss and work at her own pace.

Knowing that every second Thursday of the month is cleaning day helps me to relax a bit more during the week because I know when the mess will end and I don't have to stress about doing it all myself.

DIY Rating: 2 for picking up that mop and bucket yourself!

Shop around, you might be surprised 
to find that you can leave this one to the pros!

Fightin' Words!


Photo Credit: The Vibe


I have been hearing about martial arts for about a year from my horseback riding coach who has become addicted to Jiu Jitsu. I've been thinking about joining up and trying to get in shape for a while now and decided that last night would be the "maiden voyage" to the dojo for a ladies' drop-in kickboxing class.

Overall, it was a fun work out and there was a good vibe with the other ladies that were there. As someone who often has trouble with "right" and "left," my general lack of coordination didn't hinder things too much. The Sensei was good with helping me pace myself as a beginner. If you're looking to get into shape, this is a good overall workout.

If you're a little more hard-core, they have all kinds of activities involving serious martial arts and  fighting. For now, I think the only knife seminar I'm up for is one that involves making stir-fry!

If you're in the Kingston or Belleville area, the dojo is located in Odessa:

Sensei Stan Chisholm

Martial Concepts
119 Main Street Odessa
613 449-3828

Women's Fitness Kickboxing - Wednesdays from 7-8pm
$10 per session


DIY Rating: 8

Since I don't believe in running and 
prefer a social fitness activity, 
this is a good fit for me and may bring me 
closer to fitting back into my pre-maternity clothes...

You will hurt in the morning!


spacer.gif